One of the most exciting aspects of Zelda: Tears of the Kingdom is the fated return of the mysterious Sages, who have helped Link and Zelda vanquish evil from Hyrule time and time again. This time around you get to harness a semblance of their mythical powers by obtaining Sage’s Wills, special collectibles scattered across the map. If you’re on the hunt for them but aren’t sure where to look, here is our guide to Zelda: Tears of the Kingdom Sage’s Will explained: all Locations, what they are & how to use.
What Are Sage’s Wills in Zelda: TOTK & How to Use Them
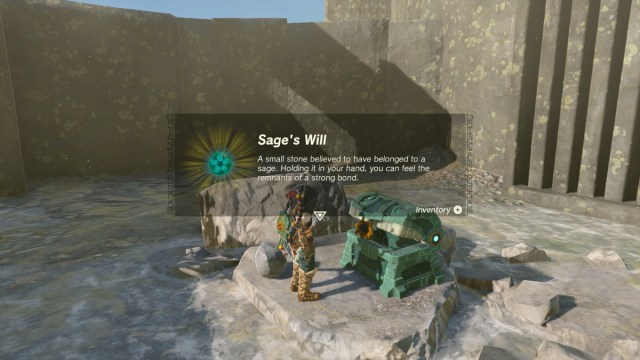
Compared to other items in the game, it’s not as easy to figure out exactly what a Sage’s Will is and how it functions. They are essentially unique collectibles, similar to Light Blessings, that are found in chests across the sky islands of Hyrule that help Link strengthen his bond with any of the five Ancient Sages, and in turn boost their attack power. The five Sages include:
- Tulin
- Sidon
- Yunobo
- Riju
- Mineru
There are 20 Sage’s Wills in all that can be found in the game, and it’s up to the player to figure out which of the Sages they want to apply them towards. It’s highly suggested to divide them practically between 1-2 of the Sages you tend to prioritize most, but ultimately it’s your decision how you want to use them.
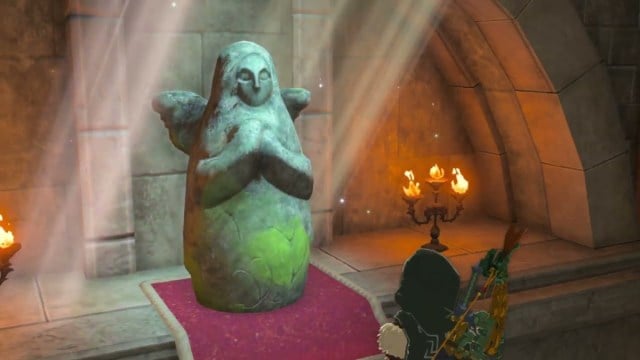
Once you’ve acquired 4 of the Sage’s Wills, take them to a Goddess Statue. Upon interacting with it, the statue will ask if you’d like to use Light Blessings or Sage’s Wills. Choose the latter and then select which Sage you’d like to give them to.
All Sage’s Will Locations in Zelda: TOTK
There are 20 Sage’s Wills that are locked in green chests and scattered across the sky islands, some out in the open and others behind tough enemy fights.
Here are all of the locations for each one, coordinates included.
South Hebra Sky Archipelago (-3068, 2129, 0647)
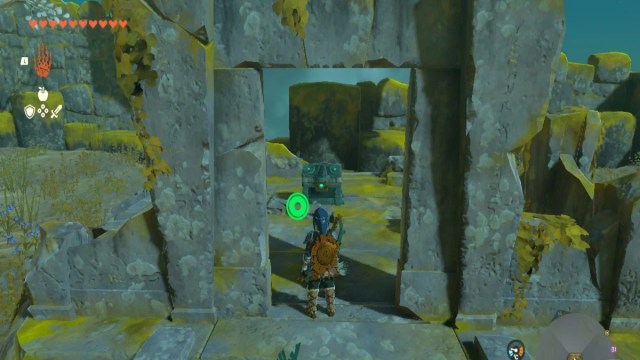
To get to this first Sage’s Will on our list, it’s a simple glide to the east from the Rospro Pass Skyview Tower. Once you land, of the two islands here you need to get to the one to the north. There’s a rail that connects the two, so we recommend making a gondola-style cart for the trip over. There are plenty of materials lying around the area for you to use.
Make note that since the northern island is also higher up, you’ll need to attach at least a couple of fans to your cart to push it upward. Once there, you’ll see the chest through an archway.
West Hebra Sky Archipelago – Gleeok (-4470, 2168, 1252)
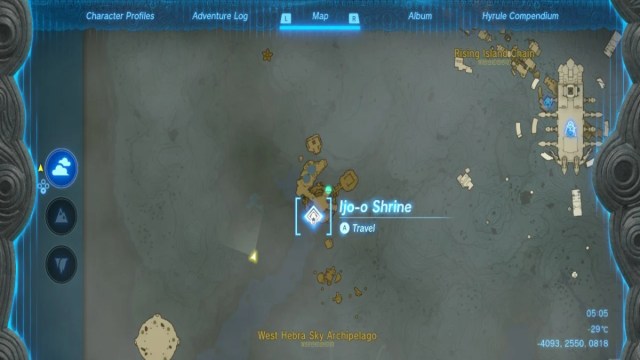
There will be a King Gleeok battle standing between you and this next chest, so make sure to prepare accordingly with elixirs, a good bow and plenty of arrows. Once you’re ready, you can again use the Rospro Pass Skyview Tower to glide your way over to this island on the far west side of the world map.
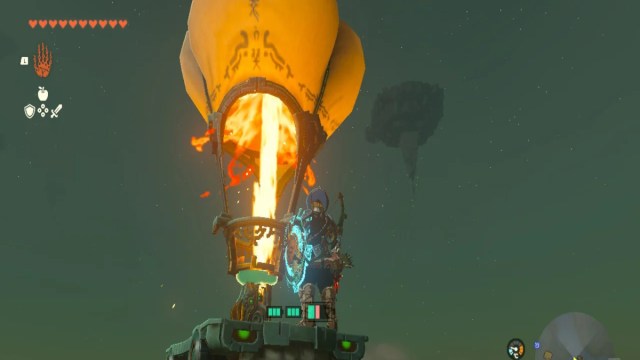
Upon reaching the Ijo-o Shrine located there, you’ll see a big floating platform that’s nearby but very high up. You’ll need a device that can get you all the way up there where the Gleeok and chest are waiting, and we’d recommend a good hot air balloon or something with rockets. A Device Dispenser on the island will give you all the necessary parts.
North Tabantha Sky Archipelago (-3780, 1572, 1237)
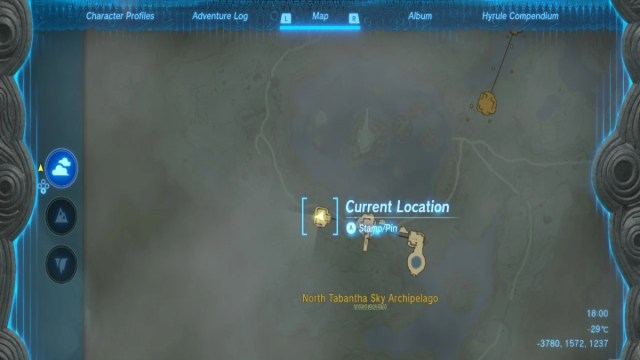
This next Sage’s Will can be found in a chest sitting on a sky island with a giant waterfall directly above Rito Village. To reach it you’ll need the Zora Armor and a stamina elixir or two, so make sure you have those equipped.
Once again, use the Rospro Pass Skyview Tower located to the north of Rito Village to launch off towards the south. You’ll see the impossibly long waterfall cascading down, and that is your target. When you reach it, use your Zora Armor to literally climb up it until you reach the island above.
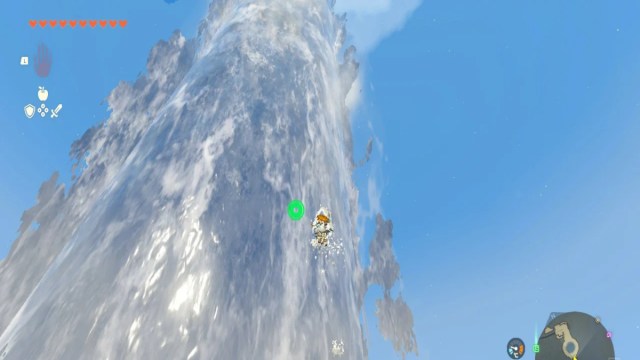
Once you get up there, the Sage’s Will chest will be on the westernmost side that you have to access by some method of air travel. Materials are available in the area to make devices like rockets, or wings, or a dirigible.
Eldin Sky Archipelago (1765, 2267, 0827)
To reach this small island, just use the Eldin Canyon Skyview Tower to glide over. Once you land, there will be a few construct enemies to get rid of, then the chest is yours.
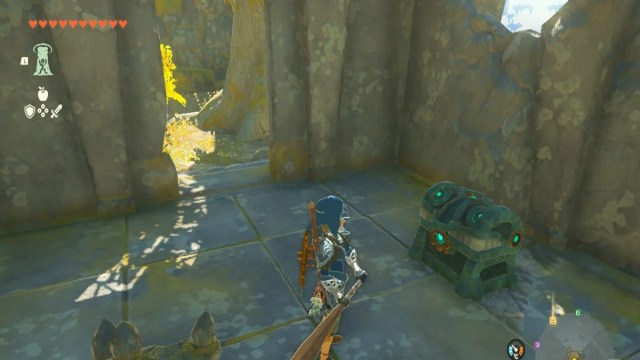
South Eldin Sky Archipelago (1779, 0978, 1226)
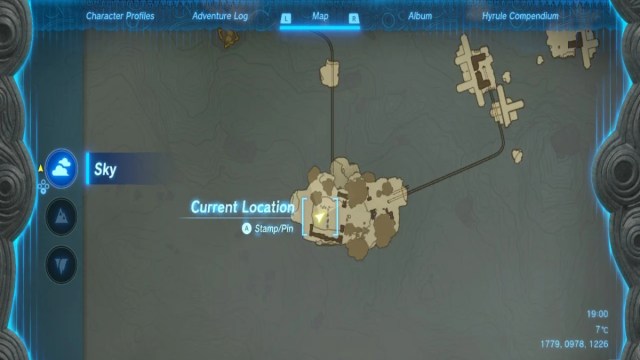
Once you reach the area seen above, the chest containing this Sage’s Will is found on the island furthest south in the group. When you get there, head down inside to the lower level where you’ll find roots covering some of the metal wall panels.
One side will not have a panel, so simply get rid of the roots and make your way through to find the chest.
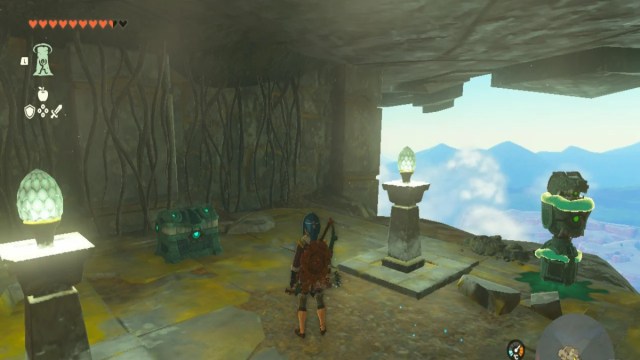
Sokkala Sky Archipelago – Akkala Highlands Sky (3819, 1635, 1110)
Travel to the island area shown above, and then look for the giant stone globe floating in the sky nearby. Use whatever handy flying device you have to get to it and head inside. At its center you’ll find a smaller version of the globe, and you need to use your Ultrahand to rotate it to the correct position.
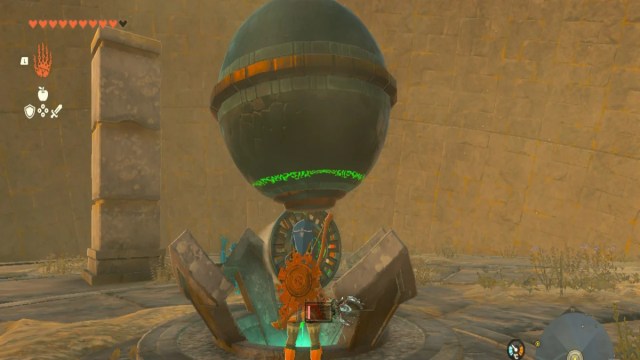
Move it until the opening of the giant globe is level with the main floor, with the top half above it and the bottom half underneath. With that done, make your way down below the floor to find the hidden chest.
North Necluda Sky Archipelago (1817, -1122, 0923)
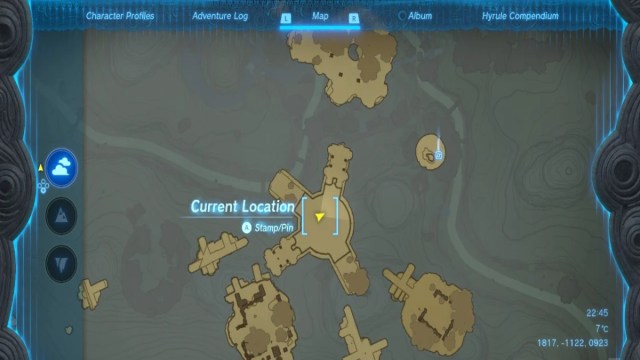
To get to this Sage’s Will, take a leap from the eastern side of the Great Sky Island to reach the area where you’ll find a big launcher at the center. Turn the wheel of it to direct the launcher at the landmass shown above, then use it to boost your way over and claim the chest.
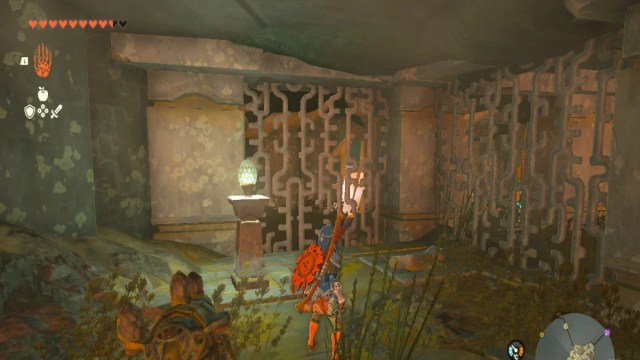
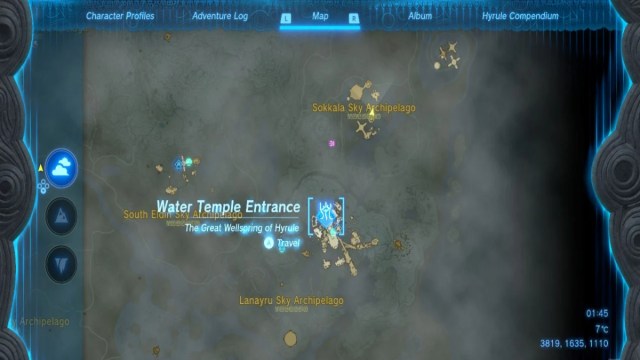
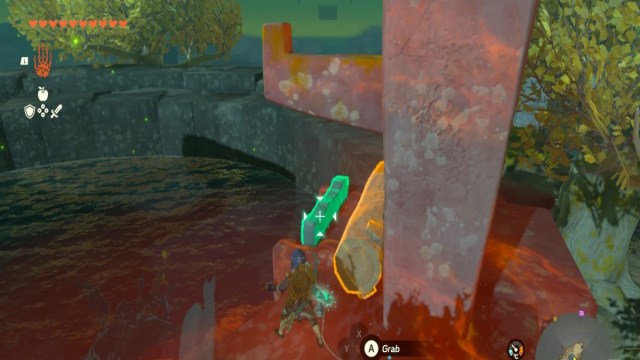
Water Temple Entrance – The Great Wellspring of Hyrule (3418, 0644, 1317)
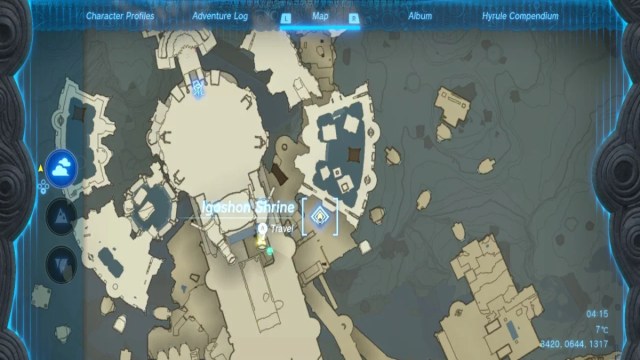
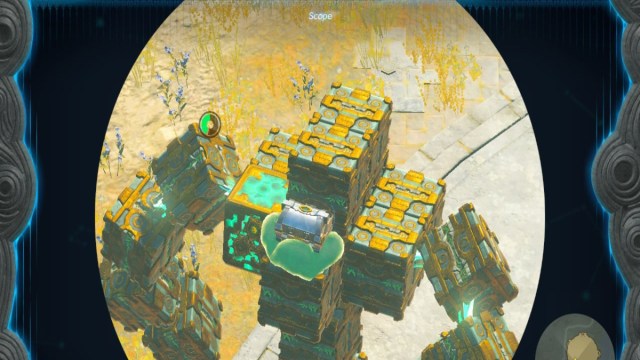
You’ll find this next Sage’s Will near the Igoshon Shrine on the island with multiple levels. Luckily you won’t have to do much exploring here.
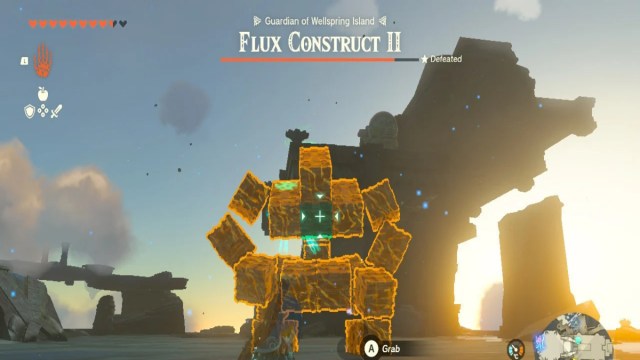
The chest itself is latched to a Flux Construct II enemy, and you can retrieve it one of two ways. Either use your Ultrahand to grab it from its shoulder as seen above, or defeat it.
Lanayru Sky Archipelago #1 (2915, 0530, 0950)
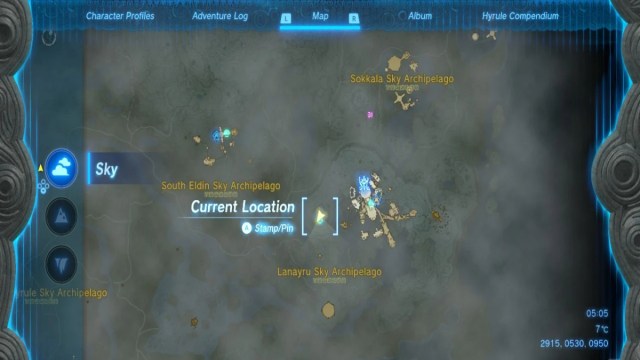
This Sage’s Will is found inside yet another giant stone globe at the location shown above. Once you get to it, head inside to find a huge Zonai fan turning the central wheel. Go over and switch it off, so that you can manipulate the globe in the same manner as before.
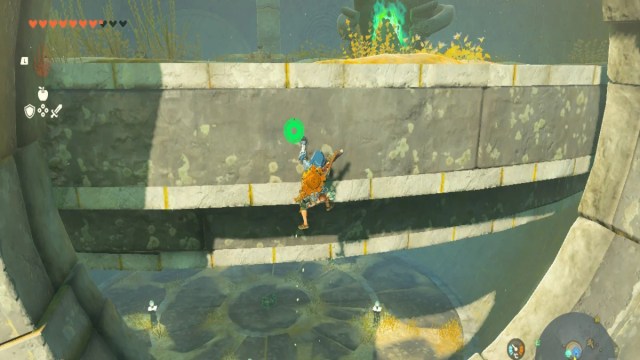
Level the floor at the main entrance so that you can climb underneath it, where you’ll find the next chest.
Lanayru Sky Archipelago #2 (3011, -0230, 0894)
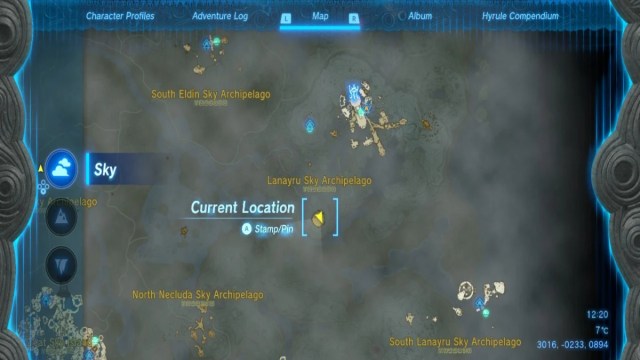
The other Sage’s Will in this area will again be guarded by a Flux Construct II enemy, and you can choose to either snatch it with your Ultrahand or fight to get it.
The main challenge here is getting to the island itself. You’ll want to have plenty of stamina on hand and take off from the southernmost island of the Water Temple area to reach it.
Faron Sky Archipelago (-0319, -2587, 0894)
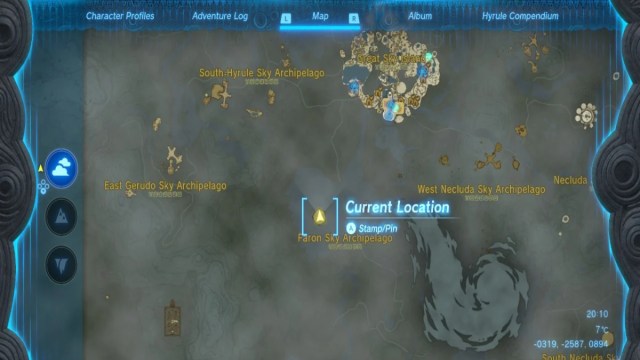
Start at the Great Sky Island and launch off to the south to reach this small landmass shown above. It’s an easy glide so don’t worry about wasting elixirs. Upon reaching it you’ll find yet another Flux Construct II to deal with. Take care of it in the way you see fit to obtain the chest.
Southeast Necluda Sky Archipelago (Directly Above Edentide Island; 2598, -2808, 1066)
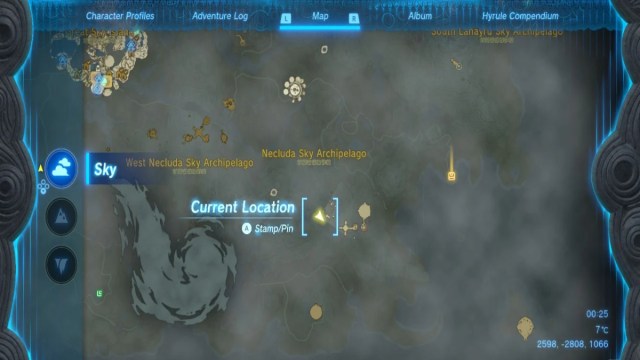
Getting to this Sage’s Will is gonna require some innovative aviation, so stock up with plenty of fans, rockets, batteries, elixirs, and wing devices. You’ll need it all to make a serious flying machine good for distance. There also will be a King Gleeok waiting for you on the other side, so we recommend waiting to embark on this one until you have a good number of hearts and all the necessary tools and healing items.
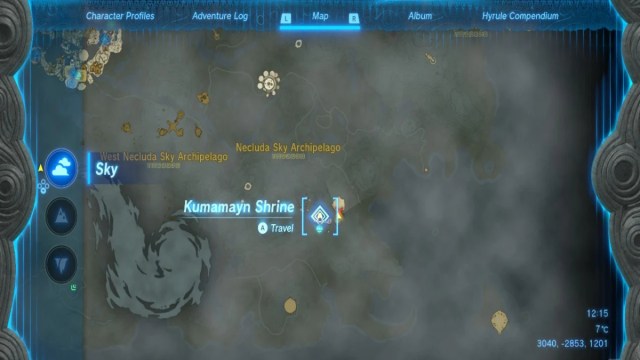
Start by launching from the Rabella Wetlands Skyview Tower and land on the islands to the east where you’ll find the Kumamayn Shrine. Pull out those Zonai Springs to get yourself all the way up to the largest island. Once there, head to the easternmost point using a nearby Flux Construct III for reference.
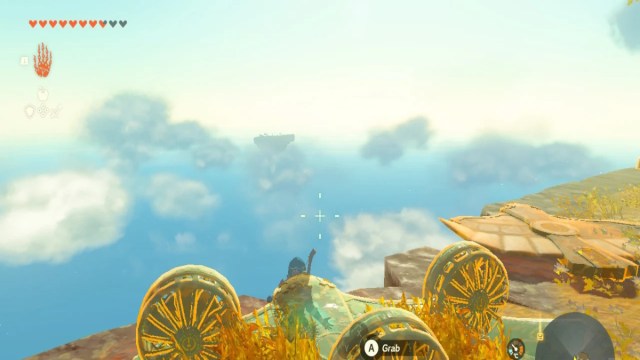
Now is the time to whip out your flying machine of choice, and make sure it has plenty of battery power and that you have a good stock of stamina elixirs.
Fly all the way to the southeast until you reach the island directly above Eventide. King Gleeok is waiting for you here, so be ready with elixirs, your best bow and plenty of arrows. His defeat will reveal the chest containing the Sage’s Will.
South Necluda Sky Archipelago (2576, -3604, 0894)
Again you’ll be taking off from the Great Sky Island to find this next Sage’s Will. Use the Rabella Skyview tower as a waypoint to get to the next island, where you’ll need to use the central launcher to get to your destination to the south.
After you land, look for the giant Flux Construct III, which will have the chest stuck to its back. You can either Ultrahand its powerblock, causing it to briefly disassemble and allowing you to grab the chest, or fight the construct to claim it. Pick your battle.
South Hyrule Sky Archipelago (-0953, -1735, 1006)
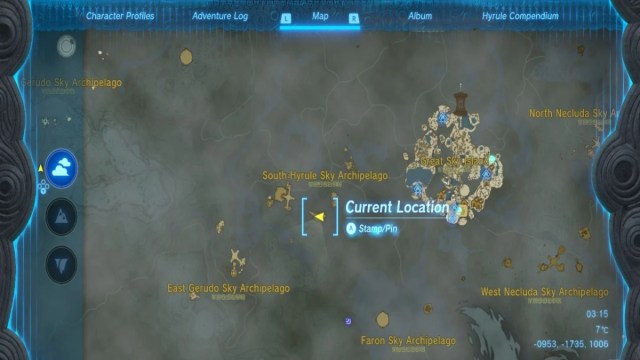
Once again, your starting point for the next Sage’s Will is from the Great Sky Island, specifically at the In-isa Shrine. Your goal is to reach the island shown above, and if you have a tough time reaching it, you can land on the island midway there and use the Zonai rockets and platforms to boost you the rest of the way.
When you get there, you’ll see two water pools, one higher and one lower. Head up to the higher pool and use your Ultrahand to grab the log and place it behind the water gate at the lower pool.
Then use your Ultrahand to lift the gate and attach it to the log, so that it stays partially open. The pool will drain out, and you’ll find your chest at the bottom of it.
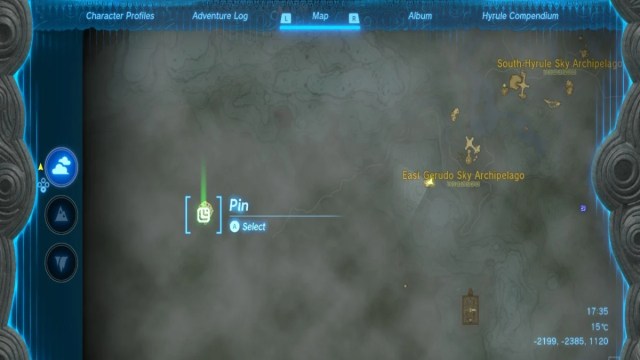
East Gerudo Sky Archipelago (-1961, -1777, 1140)
For this one, head to the Gerudo Canyon Skyview Tower and make your way east to reach the island with a launcher on it. From there, use it to launch yourself to the northwest island which contains the chest. Here there’ll be a simple puzzle to complete.
You’ll notice the island has three different levels, including the surface and two lower levels. Make your way down one level to find a Zonai Mirror device. Grab it and drop it down the nearby crevice to the lowest floor by the Zonai Flame device. Now head down there to see the chest locked inside a cage.
Make sure that it’s daytime (set a fire to rest/wait if you need to), then pick up the Zonai Mirror with your Ultrahand, catch the sunlight and reflect it at the Mirror up on the ceiling above. This will open the cage, freeing the chest.
West Hyrule Sky Archipelago (-2285, -0393, 0894)
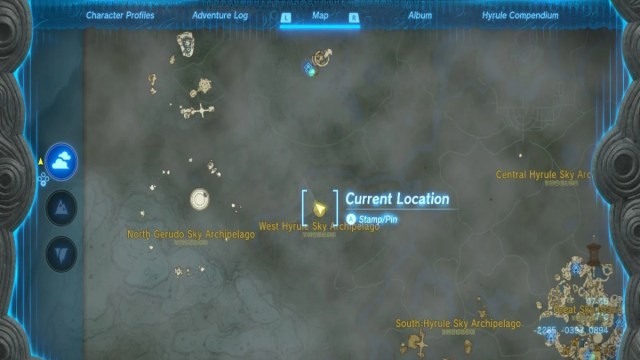
The easiest way to reach this destination is by taking off from the Gerudo Highlands Skyview Tower and gliding to the group of islands right to the north. Head to the island shown above and make your way to the Zonai platform. Use your preferred method of liftoff to reach the platform where another Flux Construct III awaits. Choose to pull its power block to grab the chest or defeat it.
Southwest King Gleeok Battle (-4445, -2725, 1419)
This next Sage’s Will is yet another challenging journey. As noted above, you will face yet another King Gleeok before you can claim your prize, so prepare yourself accordingly with that bow and arrow, elixirs, and even some keese eyes.
The most feasible method of reaching your far-off destination here is to start at the East Gerudo Sky Archipelago and go as far west as you can on the island group. There will be plenty of materials for you to make use of, such as fans, launch pads, and wing devices, so get crafting and make sure to have enough battery power for the trek.
North Gerudo Sky Archipelago – Starview Island (-3457, -0264, 1938)
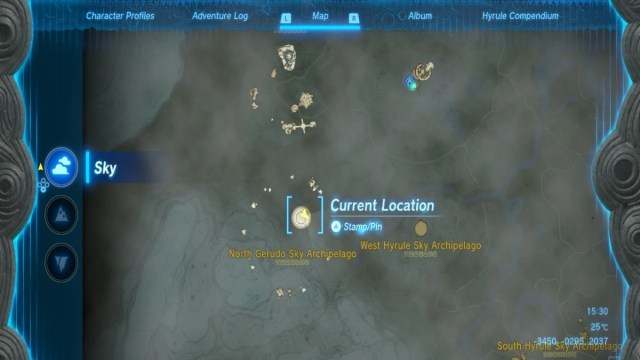
Getting this Sage’s Will take several steps, and there are multiple ways to go about it, but we’re focusing on the arguably best method. Start at the Gerudo Highlands Skyview Tower to land on the nearby island that has a water pool on it.
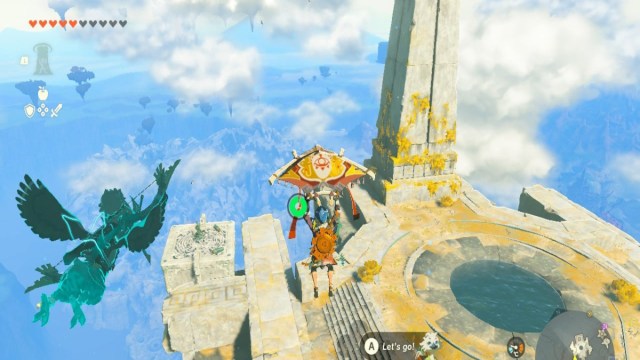
Once you reach it, defeat the construct found there and then use the rockets and fans to launch yourself up towards your next destination – the large stone globe. Land on the nearest platform and get ready to craft fast, as you only have about a minute before the platform disappears out from under you.
Make yourself either an air bike or a hot air balloon to get to the stone globe, which will reveal itself to be Starview Island, hence why we noted it above.
Once you reach the globe, head inside and get ready to solve a light puzzle. Jump down to the central platform and rotate the Zonai mirror in the middle until it’s facing the yellow button-shaped lock and nudge it up just a little.

Next, turn to your right and see that the mirror to the side is now lit up. Use the air currents flowing through the cave to follow the light beam, and turn each of the mirrors you come to in order, to create the chain around the room.
Eventually the light beam will end up back at the mirror you started at, and completing the chain will then unlock a secret shrine.
For the final step, turn the mirror you’re at slightly to the right until it reaches the yellow lock pad sticking up from the ground in front of the caged area containing the chest. The lock will turn green and the cage will open, revealing your prize at last.
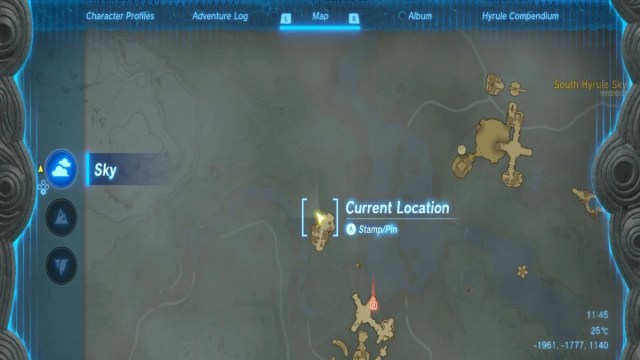
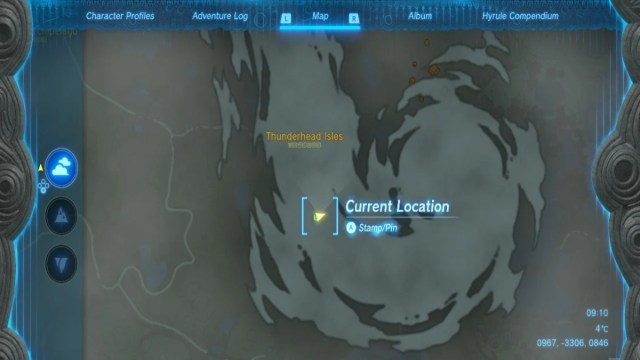
Thunderhead Isles (0967, -3306, 0846)
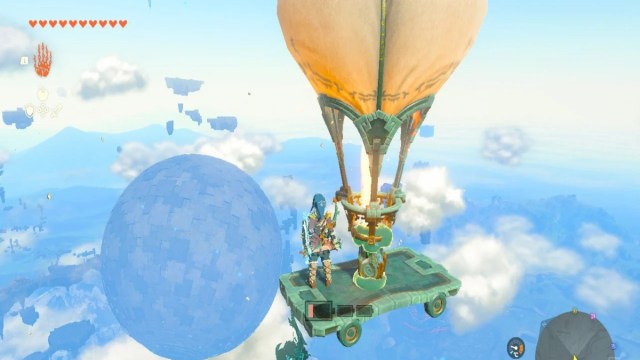
It’s time to pack both your sword and your umbrella for this one, as we’ll literally be heading into a storm. Also make sure you have your Zora Armor equipped as you’ll need it pretty soon. Start off from the Rabella Wetlands Skyview Tower, and glide to the waterfall to the west. Use your Zora Armor to ride up the cascade until you reach the island above.
Once there, you’ll spot the storm to the south, and your island destination is hidden somewhere within. Build yourself a good flying machine to start making your way towards it.
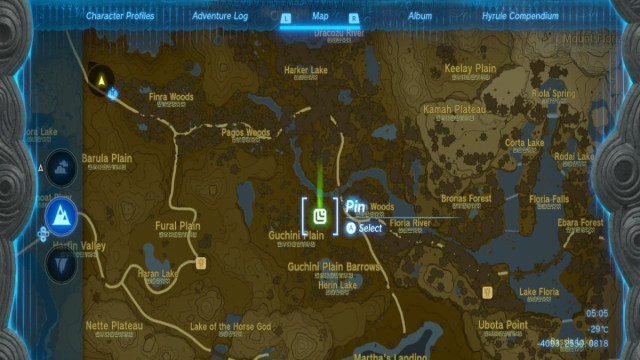
To find exactly where the island is, a surface-level pin is the best way to make sure you can navigate in the right direction without getting lost. Place one as indicated above in Guchini Plain and start your flight over there, staying above the clouds until you reach it.
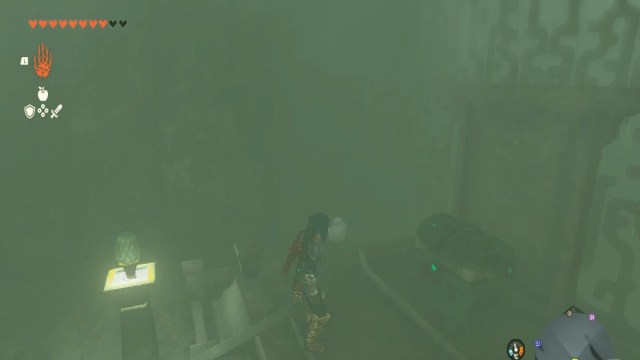
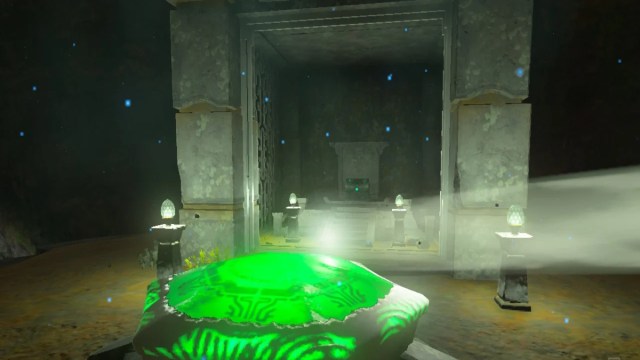
Once you make your foggy landing, seek out the breakable boulders in the ground and smash them so you can drop down into a hidden cavern beneath. Inside you’ll find the chest you seek.
Dragonhead Island (1309, -3210, 0459)
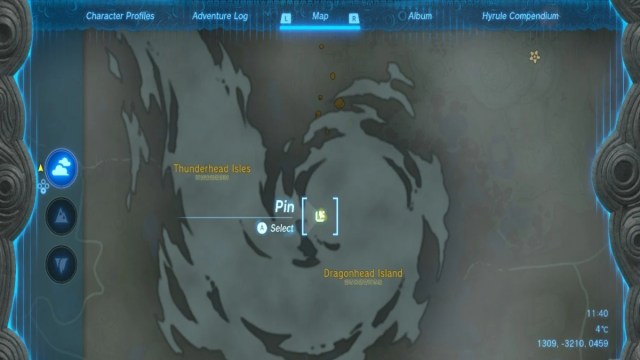
The final Sage’s Will on the list is thankfully not too far from the last one, also hidden within the same cloudy storm.
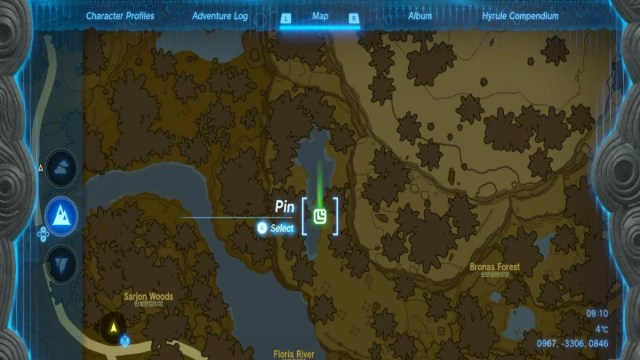
Place another surface pin to mark your path and destination, this time just north of Floria River as indicated below.
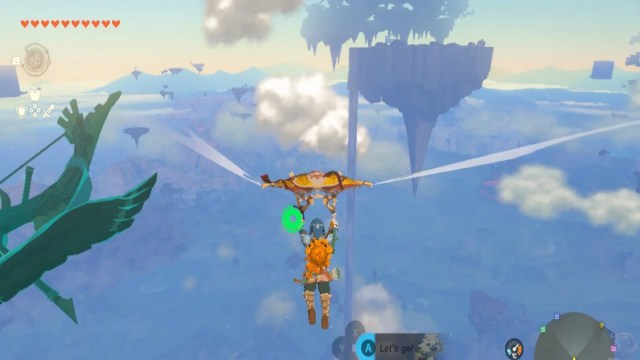
If you’re still at the same islands from the previous Sage’s Will, you can simply glide through the fog and drop down over the pin marker. If not, lift off from the Rabella Wetlands Skyview Tower as before and make your way up the same waterfall slightly to the east with your Zora Armor. From there, use your flying machine of choice to make it to the destination.
This last chest is thankfully sitting right out in the open, with no enemies to jump out and surprise you, so just mosey over and crack it open to get that final Sage’s Will.
That concludes our guide for Zelda Tears of the Kingdom Sage’s Will Explained: All locations, what they are & how to use. We hope you found this helpful in tracking down any you may have missed, and let us know what you like most about the game. Be sure to check out all of our other guides, such as how to reach floating sky islands in Zelda: Tears of the Kingdom.